Tuesday, June 4, 2013

Along Came a Spider Part 3 - GW Arachnarok

Sooooo...this post has been a long time coming.  I first started blogging about Arachnarok in 2011 and it is now 2013; that is not to say he never got finished, oh on the contrary he was done immediately and given to his rightful owner.  I just have a tendency to SQUIRREL and then just completely SHINY forget what I was doing.  Not to mention that I paint a lot of stuff in the course of a week and my little FUZZY KITTY brain just can't process that much all the time.  But, here is the last installment for the Arachnarok as promised.  Sorry to have kept you waiting.

Legs
Colors Used:
Carapace Colors - 
  • Base coat - Model Color, Red.
  • Wash - Leviathian Purple in middle.
  • Wash - Badab Black around spines.
  • First highlight (Dallimored) - Cel-Vinyl, Red.
  • Second highlight (Dallimored) - Cel-Vinyl, Orange Yellow.
Used as the overall color and highlights
Joint Colors -
  • Base coat - Citadel, Hormagaunt Purple
  • First highlight (Dallimored) - Hormagaunt Purple with Creamy Ivory added to achieve a moderately lighter shade.  Could do a second highlight with a slightly lighter shade.

Used in the joints

Techniques:


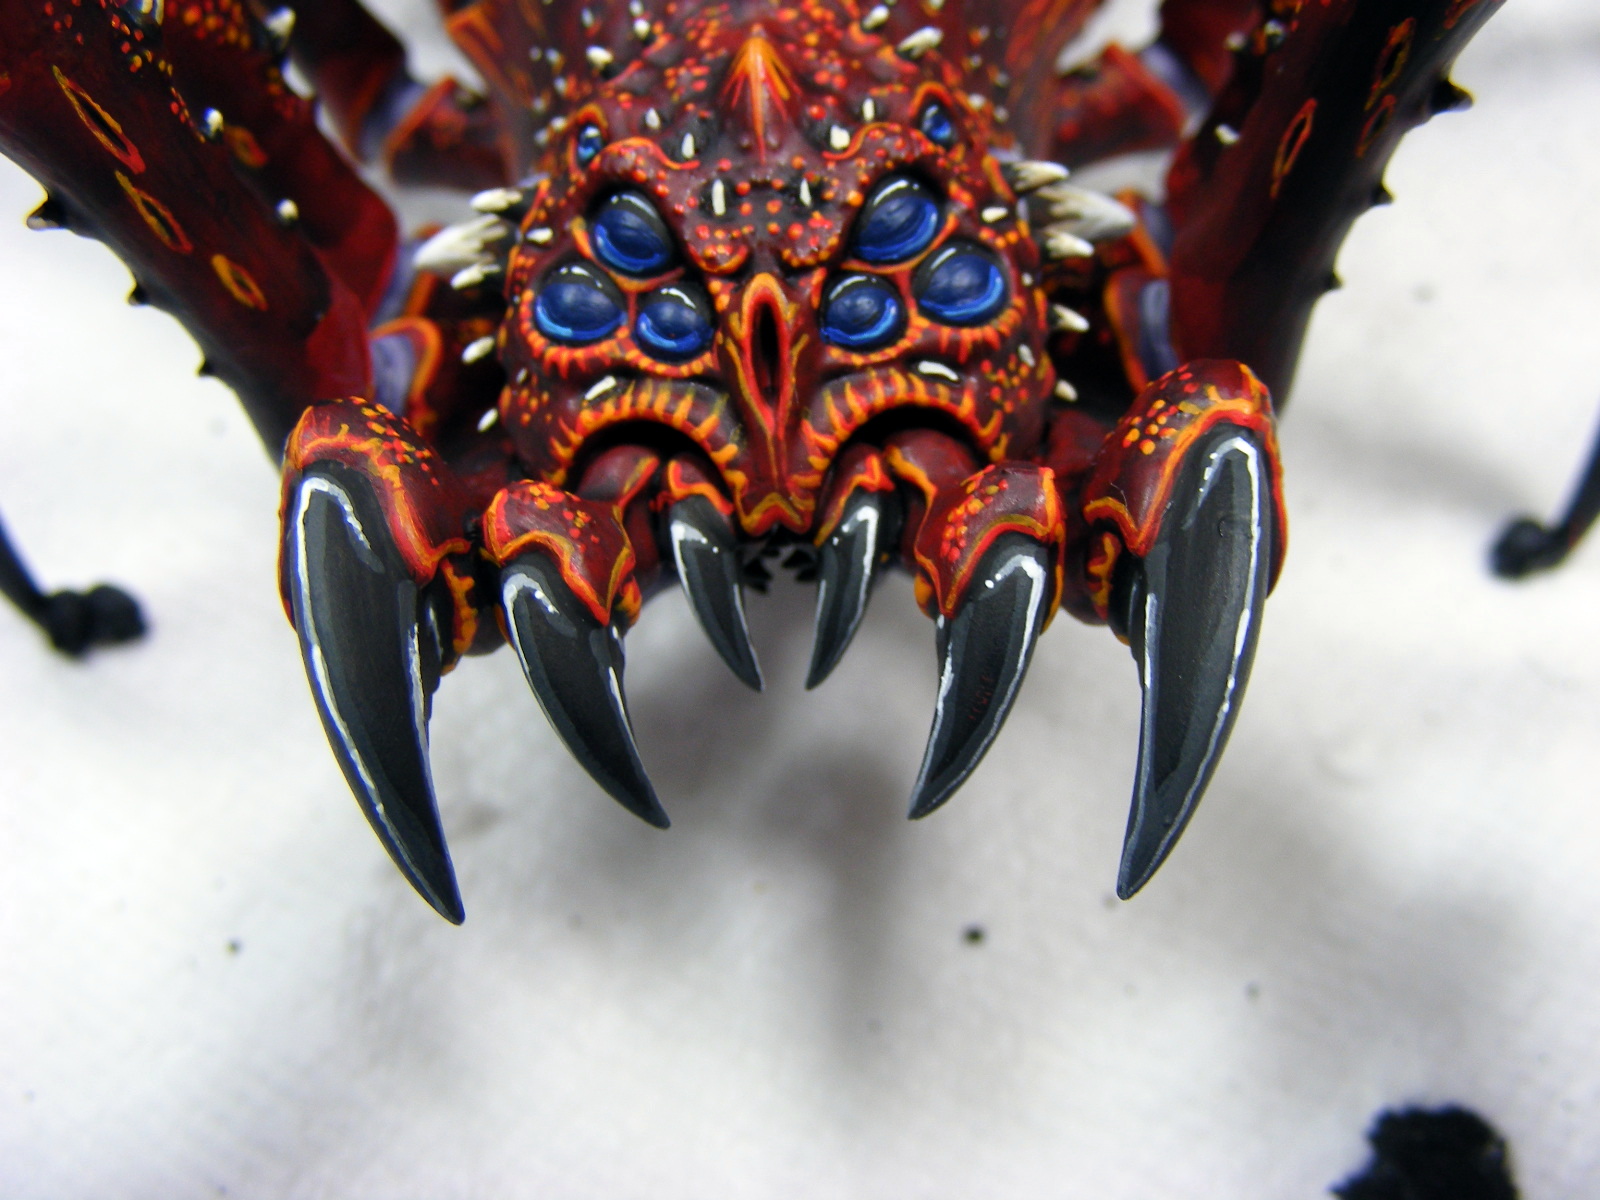
The shell of legs were based colored with Red from Model Color (as was the entire carapace of the spider in previous tutorials). As you can see in the above picture, the Leviathan Purple wash was placed around the middle of each leg section and Badab Black wash was used immediately around each spike/horn.  From the tip of each leg Leviathan Purple is drug up and while still wet Badab Black is added to the very tips.
Next, Red from Cel-Vinyl is detailed on with a 10/0 liner brush.  It is dotted carefully onto all the little raised bumps of the carapace, as well as trimming around the edges of the leg sections, and highlighting the spines.
Between the leg shell sections, in the joints, it is painted Hormagaunt Purple just as the belly of the spider had been painted.  They are then highlight with the purple mixed with creamy ivory until a lighter shade is achieved.


Then, as you can see in the picture above, Orange Yellow from Cel-Vinyl is used as a second highlight on the section edges, the spine tips, cracks, and it is added only to the bumps on the very top of the leg sections nearest to the spines.


Horns and Spines

Colors Used:
  • Base coat - Cel-Vinyl, Burnt Umber
  • First Highlight (Dallimored) - Reaper, Stained Ivory
  • Second Highlight (Dallimored) - Reaper, Creamy Ivory
  • Third Highlight (Dallimored) - Cel-Vinyl, White


Technique:
The spines/horns are base coated with the Burnt Umber.  If you look at the picture below you can see the darkness poking out at the base of the horns.  Then, with a 10/0 liner brush, paint delicately lines from the tip of the spine to the base with the Stained Ivory.  By doing it this way you ensure that the thicker portion of the line is at the tip and it becomes thinner as it travels to the base. 

Do this again with the next color, Creamy Ivory, making sure that you are traveling over the original lines done with the Stained Ivory but stop before coming to the end of the Stained Ivory line. 


Finally, use the White to make the very tip of the horn stand out and appear shiny and pointy.  Using the same technique, draw the thin lines down toward the base but stop only a 1/4 of the way down or so.


Fangs
Colors Used:
  • Base coat - Cel-Vinyl, Black
  • First Highlight (Dallimored) - Cel-Vinyl, Gray 25
  • Second Highlight (Dallimored) - Cel-Vinyl, Gray 5
  • Third Highlight (Dallimored) - Cel-Vinyl, White
Techniques:
Using Gray 25,a medium gray, add a delicate stripe that runs over the top of the fang's crescent shape.  Also, trace along the underneath portion where there is an edge.

With the Gray 5, a nearly white gray, very very lightly go over the original medium gray line that you drew in the first step.  This line should be much thinner than the original line.

Finally, using white, add an even thinner line that is intermittent, meaning that it doesn't need to be solid. This is to mimic shine or gloss.

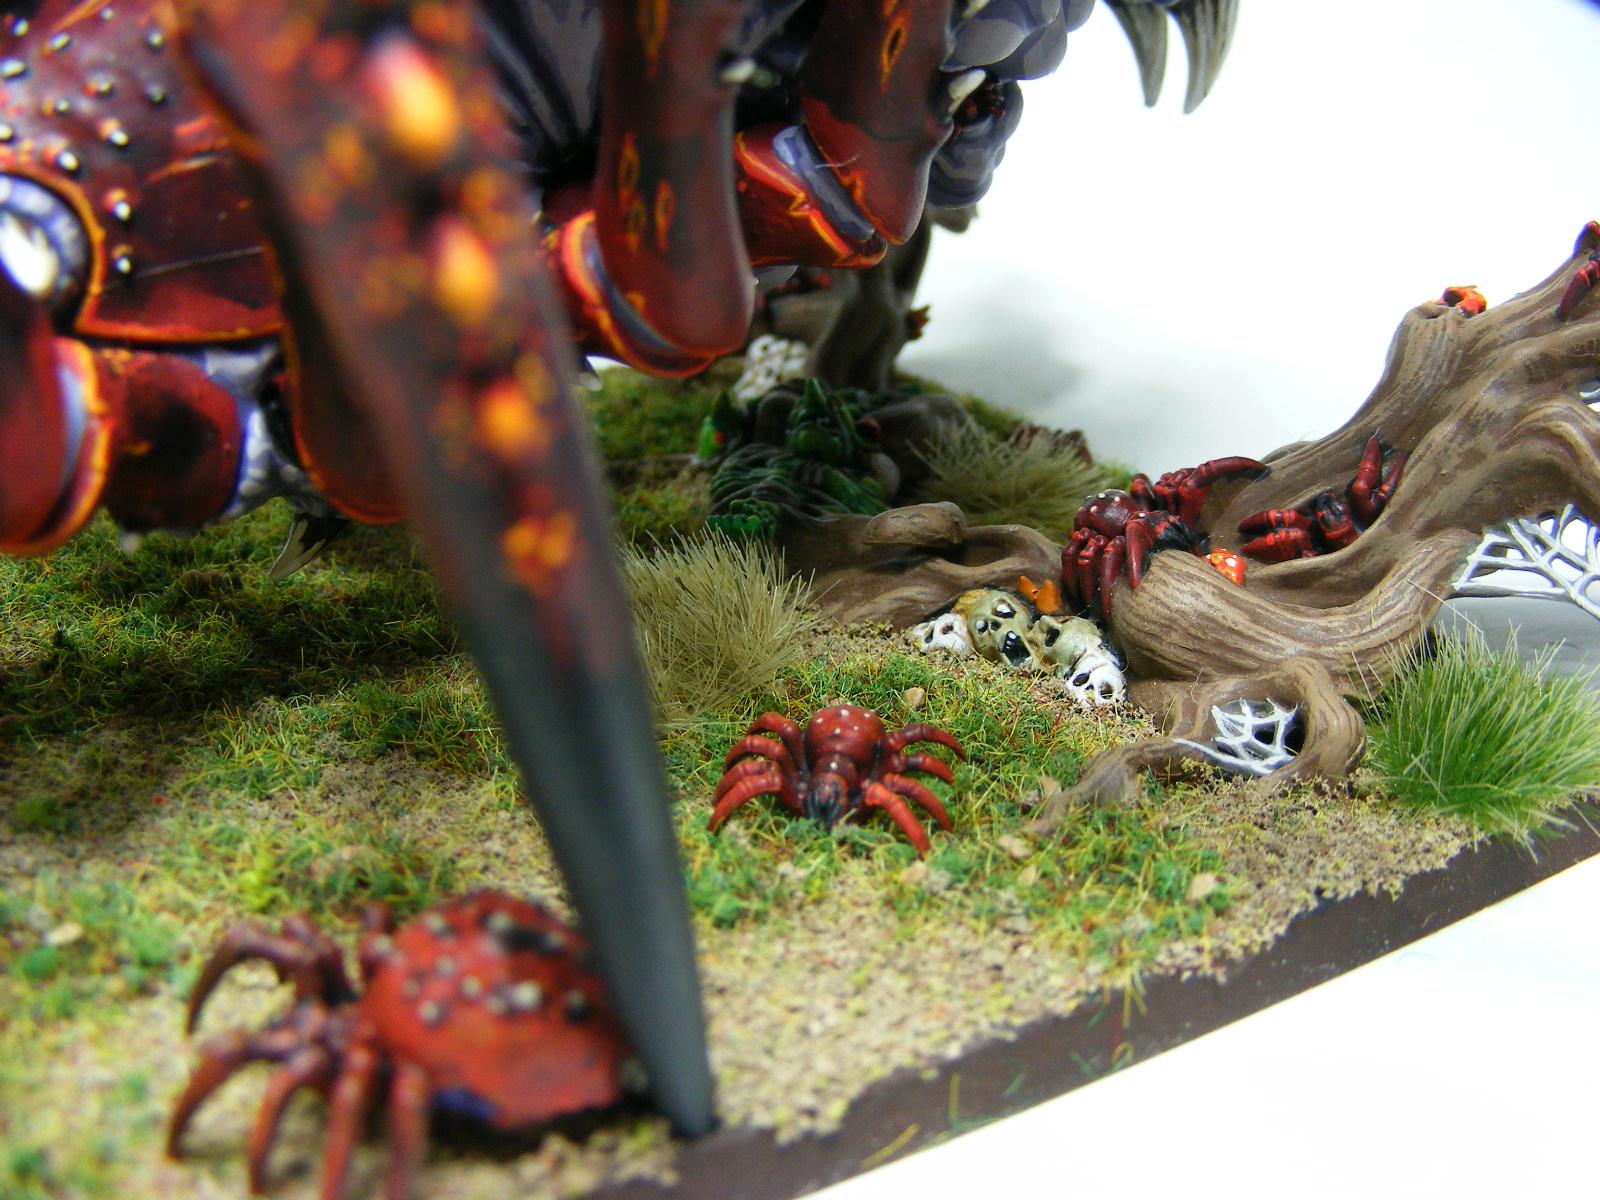
Log Base
Colors Used:
  • Base coat - Cel-Vinyl, Wood Gray
  • First highlight (dry brushed) - Cel-Vinyl, Grayed Orange Yellow

Technique:
Simply base color the entire log with Wood Gray just as you had done for the scaffold system.  Then, when dry, dry brush the Grayed Orange Yellow to catch the high-points of the log.

Goblins
Colors Used:
  • Base coat - Cel-Vinyl, Green
  • First highlight (Dallimored) - Cel-Vinyl, Lemon Yellow
  • Wash - Citadel, Thraka Green

Techniques:


The goblins are painted with the Cel-Vinyl Green.  Then they are highlighted with the Dallimore method by only painting the high points with the Lemon Yellow.  After that dries I washed them entirely with Thraka Green so it would seep down into the cracks.  You could try dry brushing the Lemon Yellow on but you run the risk of getting stray marks onto the log - so why bother.  Their eyes are Red from Cel-Vinyl.

Skulls are painted using colors in a picture below.  They are base coated in Stained Ivory, then highlighted with Creamy Ivory.  When dry, a wash of Gryphonne Sepia is used to get into the sockets and cracks.  Finally a highlight of White is lightly dry brushed on.  One could skip the middle color, I just choose to use the white sparingly because I want them to look old.  If you went straight into the white they will appear brighter and newer.  Your choice. 

For the mushrooms you can paint them any color you like.  I just used a bright red and an orange in order to tie it in with the spider above it.  I like to do that kind of thing.  But, I'm sure that purple or blue shrooms would have been cool, even plain white ones, too.
The baby spiders are painted exactly the same as mommy, only more simply since they are kinda tiny.
Base coat the baby spiders in the Model Color Red and then dot on the highlight of Red from Cel-Vinyl.  I didn't bother to try to highlight with the Orange Yellow, they are much too small.

Spiderwebs are painted using colors in a below image.  Coat the webs entirely in Bone Shadow and then highlight with Aged Bone and Polished Bone.  Again, you could skip the middle color but I used the Polished Bone specifically just to run the very edges of the tops of the webs to make them pop.  The Aged Bone goes over all the edges of the webs.


 Scaffold, finishing touches

These colors are used for skulls and bones on the entire model, including the base.

Used for all spider webs on the entire model.


The scaffold is time consuming because of all the fiddly bits.  Here is where you need to detail all the spider webs that are used to lash the scaffold together, complete the skulls and bones and lighten the sharp, pointy ends of the scaffold that stick out.

Notice in the images above and below that the points of the scaffold are painted with Grayed Orange Yellow, they were also given a drybrushed highlight of Creamy Ivory (not shown in picture).
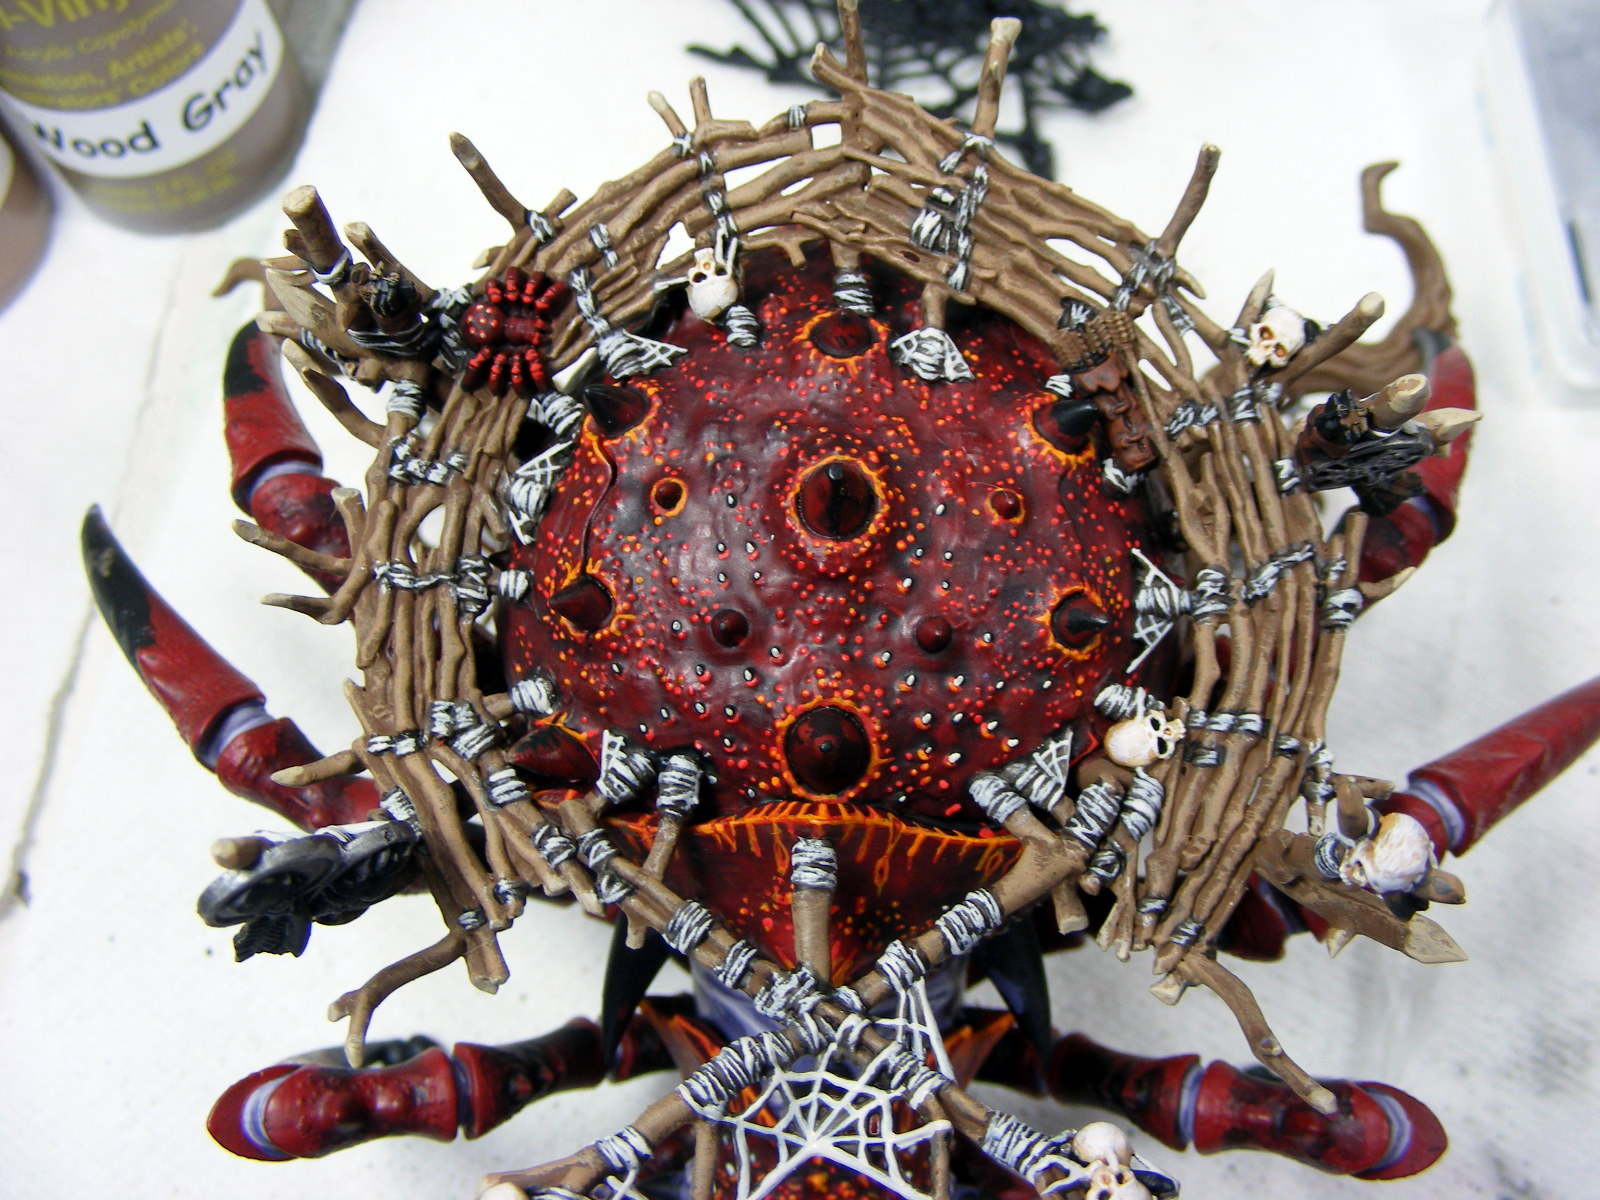

The shields are done in Citadel Chainmail and washed with Devlan Mud or Badab Black.

Feathers are simplest done when painted solid white and washed with a diluted Badab Black, so that it forms a soft gray.  Or, you can water down a gray paint until it becomes a wash.

Spiderweb lashings are painted Bone Shadow, washed with Devlan Mud, and very carefully detailed with a 10/0 liner brush with Polished Bone.  I tried drybrushing them to make the process easier and quicker, but it looked too sloppy.  Just take your time, make sure the Polished Bone is wet enough (but not too wet that it seeps between the strands).  By ensuring that the paint is liquid enough you can make smooth lines quickly.


 ____________Finished Product____________


Monday, June 3, 2013

Liberi Warband - Part I


Fanticide, Liberi Warband (Centaurs)
manufactured by Eureka Miniatures and Alien Dungeon

Note: This is the first part of a two part painting demo.

There is nothing more challenging than painting horses.  Crazy am I?  Simple you think?  Well, that's where people go wrong.  They think that a horse is simple because it is brown, so they trust their memory of what the horse looks like.  At that very moment the memory becomes faulty; unless of course you raise horses or are an equestrian, then I'd trust your memory. Horses are not merely brown, neither are trees for that matter, and one would do better just to admit a faulty memory and look up what a horse should look like.  The internet is awash with images of horses, or you could get a very nice book like Bob and I did.  Pick out your horses, make a painting plan, select your paints, and get started.

I am painting 45 Liberi Centaurs for two customer orders.  Because 45 can be a daunting size I have chunked it into three sections for variety and sanity's sake: plain, Mustang, and Appaloosa horses.

Picking Out Horses
The internet holds hordes of horses, a plethora of ponies, a menagerie of mares, and a superabundance of stallions...yeah, you get the point.  Well, then why don't you use them!  Okay, okay, sure these are fantasy horses, centaurs to be exact, and one could argue that they could be any color your heart desires.  I'm here to tell you, "No, they can't.  It makes you look crazy."  Now, I'll go against that if you are painting horses with a My Little Pony theme, then fine, go for the jellybean pink and sky blue.  But, if they are meant to be real horsies I suggest you paint them as such.  Here are some of the images I was using as inspiration:


It is also important to match up mane and tail colors to the horses; well at least I think so.  Use the photos to do this.  Not all horses have black hair, some have off-white manes with brownish black tails.  Take the little bit of extra time to get it right and it will pay off in the end result.

Make a Painting Plan
Its like I always tell the students at school, make a plan before you write, know the steps you want to take and the direction you want to go before you even start creating sentences.  That theory applies here, too.  When doing something as complex as Mustang or Appaloosa horses you need to designate which figure is plain, Mustang, or Appaloosa; and which figure is getting what colors.  So, as you can see in the image below, first, I separated the figures into three categories and kept the leader figures separate.


Then, secondly, I have written the names of the internet images that I want to use as inspiration with the corresponding figures.  I do this on my painting mat (paper towel) because it is easy and when I'm done I can flip it over to the clean side or just throw it away.  I want variety within each order, I don't want to repeat colors or patterns too much so it really is essential that I think this through before beginning.


 Pick Out Your Paints
Starting with grays first on the left, I have an array from black to a mid gray.  Cel-Vinyl makes a step-down system of colors so it takes the guess work out of a base, middle, and highlight color.  In this case you might forgo the middle color and just go with a base and highlight.  On the right end are whites.  For a true white look I went with a Gray 5 (which I forgot to photograph) and a highlight of White.  For an off-white or very light taupe I used Dheneb Stone with a highlight of Stencil.


This second set of paints are for the brown horses, of course.  I need a deep brown, a red brown, and a camel or light brown.  They are used in order  Burnt Umber base with Brown highlight; Brown base with a Light Brown highlight; Light Brown base with a Light Brown 10 highlight.  If I wanted a very dark brown I could use Raw Umber (not pictured) or Black as a base and then highlight with Burnt Umber.


Get Started
Once you're all set up begin painting by blocking in the larger color or the color that is easier to paint over.  A lot of times it is difficult to paint whites over other colors so I chose to paint the white areas on the horses first.  The horse images below are of the Appaloosa horses I was working on.  When you look at the images of Appaloosas they are primarily white with colored spots so it would be smart to paint the primary white color on first.


At this point I would also highlight the white areas.  So, if I started with a base of Gray 5 I will highlight with White. With Dheneb Stone I will highlight with Stencil.


Now comes the time to fill in with the other color and create the polka-dot pattern that Appaloosas are so well known for.  Don't be intimidated by the dot pattern, because it isn't a pattern.  Try not to be so precise, the spots shouldn't be circles, they shouldn't form a symmetrical pattern, and they shouldn't all be the same size.  Easier said than done, it just takes practice to get it not so perfect.

After that, go in and highlight the second color, even the spots; but not all of them, mostly just the larger ones.  You can do this by doing a damp overbrush with a small, flat headed paintbrush or you can pseudo-Dallimore it with a smaller size 2 brush.


As you may notice on some of the horses below there is a faint haze around the spots or where the brown/gray meets the white.  That's because I used a wash to make it bleed into the white.  If you look at the horse photos you'll see that the dots are irregular and a little blurry, they don't have crisp edges.  A little bit of water diluted paint or a wash that is a corresponding color can help achieve that, but be conservative with it because you don't want it to overwhelm the nice white fur.


I think that light brown one on the right hand side, it is unfinished in this photo, is my least favorite.  I was trying to imitate one of the horse images but it doesn't quite capture it, even when finished. 
Here are some close ups of a couple Appaloosa and Mustangs that I did...


Now, the final steps will be painting the flesh of the Indian portion of the Centaurs, the accoutrements, and weapons.  I will cover this in the next blog post sometime during the week.


Thank you for reading,

Allison